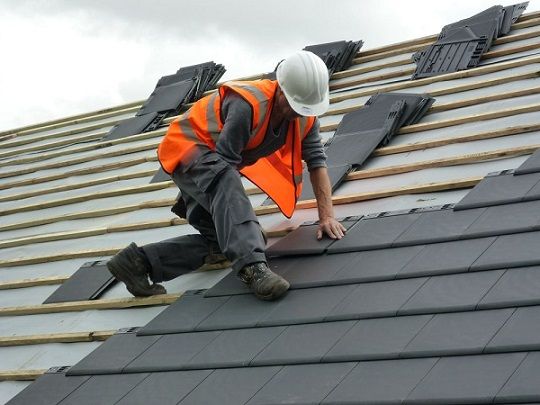
Important Tools For Roofing

Preparing for roofing, whether you start your own roofing business or need to equip yourself to go to work, requires some tools just to get out of the door. We have compiled a list of these tools so that you can prioritize your purchases. Although we have listed those that seem important to us, this is far from being a complete inventory.
Roofing Nailer
A nailer is a primary tool that makes you a roofer. The skill you develop in nailing and adjusting your nailer is what is necessary for the roofing process. Overall, the most effective roofing nail gun is a coil nailer. You can get them in several different sizes that adapt to several different nail lengths. They are also useful if you need to pull ring shank nails to deposit plywood. There are battery and pneumatic models, and they both do the job. By far, however, the industry favorite is still the air pistol. With any nailer, you need to be certain you have enough attachments to keep it working.
Many people also like staplers. Staples that have a crown of 1″ to ½” are also beneficial roof fasteners. Most suppliers of coil nailers also have a version of the stapler. The most significant disadvantage of staplers is that they are much more specific to the particular type of staples you are using and that most staplers are not for roofing.
Roofing Hammer
It is the hand tool that you will most often need to accompany your nailer. Most often, to hit nails that were not correctly oriented, you can always get a good seal in the tar line. Sometimes you have to pull a nail and start over. It is the primary tool to have in your nail bags, with your roofing knife. It will help you remove stray tiles, clean up the work area, and hit the nails during the final inspection. When you go to buy a roofing hammer, you will notice that there are several different forms of the hammer, which all come under the title of the roofing hammer. Some look like a hatchet. Others look like an ordinary hammer with one of the claws missing. Different looks are standard with different types of roofs to choose from.
Shingle Remover
The term is often synonymous with roof shovel. There is a specific version of a shingle remover that looks like a toothed shovel, but there are several versions of a shingle remover that are all used in different applications. Some aim to facilitate the tearing of a person. It helps guide the old roof removed in a roll. It also has wheels and gives you a cart to help transport it. Others are for a traditional team that can form a tear-off roll fairly quickly and carries it for disposal.
Hammer Stapler
Roof work can stop without the proper tools to lower the underlayment. A hammer stapler allows you to staple your paper with the same quick motion as you nail down the tiles keeping your team productive and using techniques familiar to them. Hammer staplers are durable and use T-50 staples, the most common and most natural to obtain. They have the same essential parts as an ordinary T-50 staple gun, except that they are impact adjusted so that they are easy to use and can be refilled on site.
Ladder
You should know you aren’t getting any job done in the absence of a ladder. And if you’ve been using an increasingly unstable ladder for a long time, it’s time to get a new ladder that gives you a sense of security. This is because a new ladder is a commitment to make sure you get on that roof and do it safely. The two and three-fold adjustable ladders are very durable, sturdy and can be compacted to a size that easily fits in any vehicle for transportation. Extension ladders have various adaptations to reach the roof or the installation of ladder jacks for staging to contain the material. These are very handy when you are on a steep slope and need a place to work.
Safety Harness
On low-pitched rooftops where balance is no issue and where the overhang are under 12 feet or progressively over the ground, you can have a sense of security working with simply rooftop racks and boards square. It is adequate. Be that as it may, to have confidence in rooftop security, particularly on taller structures, it’s ideal to buy a safety bridle. The saddle is just piece of an individual fall capture framework. This is known as a “framework” since the entirety of the parts – the outfit, cord, link tie, rope, and rooftop grapple – are painstakingly intended to function together. The rooftop grapple ought to be safely appended to strong wood, for example, a crossbeam, bracket, or edge shaft, not right through the rooftop boards or compressed wood. Models vary in applications, so study their particular manuals and follow wisely. Here are some key focuses:
- Investigate the outfit and cord for free creases and worn lashes. Never reuse a tackle or string that has been dropped. Return them to the maker for investigation. Analyze the rope for fraying.
- Modify the tackle clasps for an ideal fit.
- Ensure the anchor stays legitimately above where you will be taking a shot at the rooftop. Try not to exceed four feet from the side of the rooftop anchor. Move the anchor or include different anchors if essential.
- Mount the rooftop grapple on the top in any event 6 ft from the edge of the rooftop.
- Reposition the slider while you work to limit the free length of the rope among you and the rooftop grapple.
Conclusion
It is always good to try out these DIY steps on your own, especially when such a roofing project or roofing repair isn’t critical. However, don’t hesitate to contact roofing professionals if things get too complicated.
